
Call Us
+86-18962820095

 Español
Content
- 1 The Direct Answer: Match Grommet Size to Material and Reinforce the Hole Site
- 2 Gathering the Right Tools Before Starting
- 3 Step by Step Installation Process
- 4 Grommet Spacing Guidelines by Application
- 5 Reinforcing Corners and High-Tension Points
- 6 Mistakes That Lead to Grommet Failure
- 7 Caring for Grommets After Installation
The Direct Answer: Match Grommet Size to Material and Reinforce the Hole Site
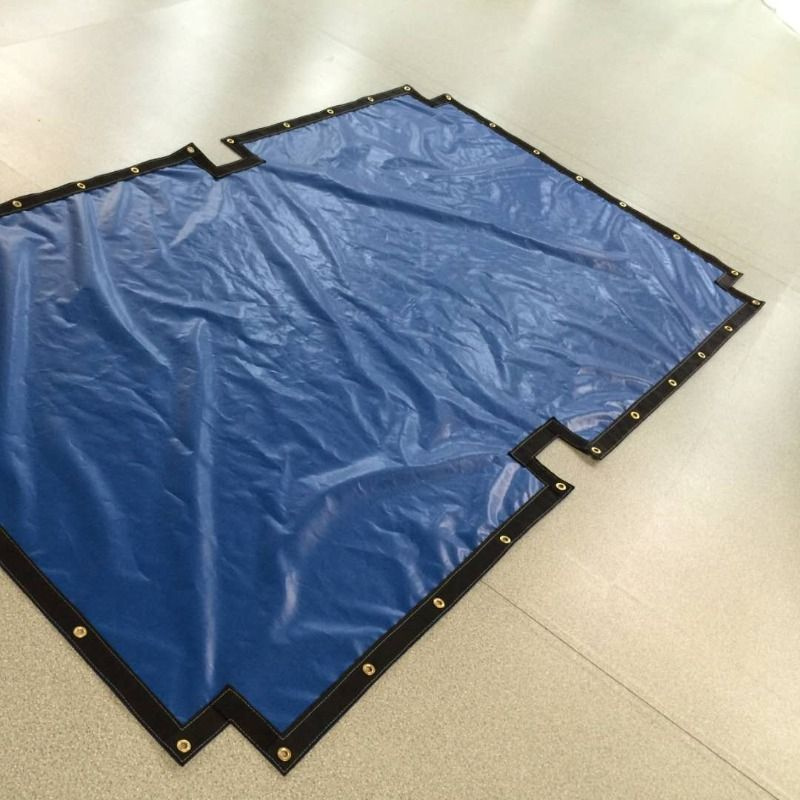
Installing grommets on PVC Tarpaulin starts with selecting a grommet size that matches the tarp thickness, reinforcing the punch site with an extra fabric layer or webbing, then setting the two-piece grommet with a properly sized die and mallet or hand press. An improperly sized or unreinforced grommet is a leading cause of early tear-out, since wind load and repeated tie-down tension concentrate stress directly at the grommet hole, and PVC-coated fabric without backing support can stretch and split under that pressure.
Getting the punch and set steps right the first time matters, because a poorly set grommet is difficult to fix without cutting out the hole entirely and starting over on a fresh section of material.
Gathering the Right Tools Before Starting
A clean, professional grommet installation depends on having correctly sized tools matched to the grommet being used. Mismatched dies or dull punches are one of the most common reasons a first attempt at grommet setting fails.
Basic tool list for grommet installation
- Two-piece grommets in brass or stainless steel, sized to the tarp thickness
- A sharp punch tool slightly smaller than the grommet barrel diameter
- A matching die and anvil set for the chosen grommet size
- A mallet for hand setting, or a hydraulic press for larger production runs
- Reinforcement webbing or PVC patches for corners and high-load points
Grommet sizing is usually labeled by number, with smaller numbers such as 0 or 1 suited to lightweight tarps and larger sizes such as 3 or 4 built for heavy commercial-grade tarpaulin used in transport and construction settings.
Step by Step Installation Process
Working through the same sequence for every grommet keeps spacing and quality consistent across the entire tarp.
Grommet setting steps
- Mark grommet positions evenly along the hemmed edge, generally 1 to 2 inches in from the border
- Add a reinforcement patch at any point expecting heavy tie-down tension
- Punch a clean round hole sized slightly smaller than the grommet barrel
- Push the male barrel piece through from underneath the tarp
- Fit the female washer cap over the barrel on the top surface
- Position the assembly on the anvil and strike the die squarely to flare the barrel
- Check that the finished grommet sits flat with no gaps between the cap and fabric
A correctly set grommet should not shift or spin freely when pulled by hand, and the barrel edge should be evenly flared all the way around rather than crimped tighter on one side.
Grommet Spacing Guidelines by Application
Spacing determines how evenly load is spread across the tarp edge. Grommets set too far apart place more strain on each individual point, raising the risk of tearing in windy or heavy-load conditions.
Typical spacing by tarp type
| Light-duty cover tarps | Grommets set 18 to 24 inches apart |
| Standard equipment or truck tarps | Grommets set 12 to 18 inches apart |
| Heavy industrial tarpaulin | Grommets set 8 to 12 inches apart with reinforced corners |
Corners nearly always need tighter spacing and stronger reinforcement, since they absorb the greatest pulling force whenever the tarp is stretched taut or hit by strong gusts.
Reinforcing Corners and High-Tension Points
Grommets placed at tie-down corners handle repeated, concentrated stress far beyond what a mid-edge grommet experiences. Adding a double layer of PVC material or a nylon webbing loop before punching the hole significantly increases the pull-out strength of that grommet.
Reinforced corner patches can raise tie-down pull resistance well beyond what a single-layer grommet setup provides, based on standard tie-down strength testing used across heavy-duty tarp manufacturing. Suppliers such as Tarpaulin.cn build reinforced corners directly into many of their PVC tarpaulin products for exactly this reason, reducing the need for aftermarket patching in high-stress applications.
Mistakes That Lead to Grommet Failure
A handful of recurring errors account for most grommet problems reported after installation, and nearly all of them are avoidable with careful setup.
- Punching an oversized hole that leaves the grommet loosely gripping the fabric
- Striking the die off-center, resulting in an uneven crimp on one side of the barrel
- Leaving corners and load points unreinforced before punching
- Pairing a grommet with a die of the wrong size, preventing a proper flare
Testing the die and grommet fit on a scrap piece of tarp material before working on the finished product helps catch sizing mismatches early, before any holes are punched in the actual tarp.
Caring for Grommets After Installation
Once grommets are set, periodic checks help catch corrosion, loosening, or surrounding fabric wear before they become a larger problem. Stainless steel and brass grommets generally outperform plain steel in outdoor environments, since they resist rust that can otherwise stain and weaken the surrounding PVC material.
Addressing a loose or corroded grommet as soon as it is noticed, rather than continuing to use it under tension, helps keep small issues from spreading into larger tears across the PVC Tarpaulin surface and extends the overall service life of the tarp.